
How to Block Your Work
You could use any flat surface to block your garments, you can even purchase a knitters block, just be sure that your piece lies flat and fully dries so that its shape sets. Don’t forget to check that moisture doesn’t soak through and damage anything underneath it. Placing a plastic garbage bag underneath will help avoid this.
Always block your finished pieces before seaming. By flattening and setting the shape of your pieces, you will be able to more easily line up your stitches to seam them together.
The fiber content of the yarn and the stitch pattern of your work will often determine how you block your finished pieces. Below you’ll find instructions on wet blocking, which is my preferred method.
Instructions for How To Block
Step 1: Wetting
Soak your item in gentle wash per the yarn label instructions. Normally this is done by soaking in wool washing liquid, which is specially designed to keep natural fibers soft.
While your item is soaking, set up the surface that you will using for blocking. If you’re using the Knitter’s Block, configure the tiles to accommodate your item.
Drain the water, then gently squeeze (don’t wring) your knitting or crochet and roll it in a towel to extract as much moisture as possible.
Step 2: Blocking

Pin the item around the edges, placing the pins at an angle, with the top of the pin pointing away from the garment. Place the first pin in the top center, moving to the bottom center as you pin the piece to the correct length. Next, pin your work to the correct width (if blocking a sweater, start with the bust width). Fill in around the edges, always referring to your finished measurements.
Allow to air dry.
To help hold rolling edges down either use a few sewing pins or dampen a cloth and use its weight to hold down your work.
Allow to air dry.
Step 3: Steaming (optional)
- Set the temperature of your iron to the lowest setting that allows steam.
- While the iron is heating, saturate a cloth with water and squeeze out the excess so that it is no longer dripping but still very wet (not just damp).
- For very heavy blocking (thick, coarse wool that you are trying to soften up, for instance) you can spray the whole piece with water from a clean spray bottle. This step is not necessary for medium/light blocking.
- Lay the wet blocking cloth over the top of your pinned piece.
- Gently use the iron to steam the entire piece in an up and down motion (never side to side) without any pressure. Using pressure may ruin your knitting.
- Just barely touch the pressing cloth with the iron and hold it there a few seconds. Move on to the next spot until the whole piece has been steamed. The moisture of the steam is what does the blocking.
For light blocking, you can now lift the cloth and allow the work to dry.
For medium/heavy blocking, leave the cloth in place until it has dried. If your work is still damp, allow it to dry before removing.
Regardless of whether you block with or without steam, make sure your pieces are dry before moving them.
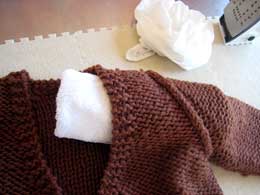
Seams
After you have sewn your garment together you may wish to steam the seams, especially if they are bulky or stiff. For shoulder and armhole seams, use a terry cloth hand towel folded and then rolled to the size and shape of your upper arm. Turn the garment inside out and fit the rolled towel into the shoulder and armhole openings. Steam the seams gently by using the wet pressing cloth and steam iron, and just barely touching the pressing cloth with the iron. Let the steam do the work.
STEP BY STEP VIDEO ON SIMPLE BLOCKING