Needlesculpting is a finishing technique you can use to improve the shape of your amigurumi. It uses a yarn needle and length of matching yarn to draw in certain areas of an amigurumi to alter its shape.
If you’re following a pattern with crocheted shaping built in, you shouldn’t need to do this, but it can be a useful tool to have in your arsenal, if you want to:
- Fix ‘lost’ shaping: If you’ve crocheted too loosely or been over-generous with your stuffing, and the built-in shaping has been lost.
- Add extra definition: Exaggerate the shape of your amigurumi.
- Make easy modifications: Alter the shape of a pattern without modifying the stitches you crochet.
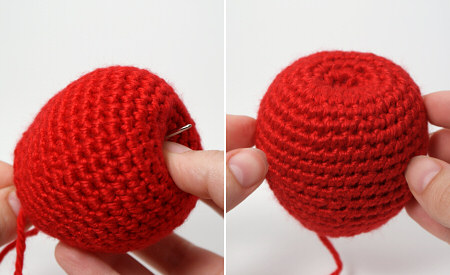
Dimple
Drawing in at a point makes a dimple. You can use this to make, for example, an eye socket, or the dimple at the top of an apple!
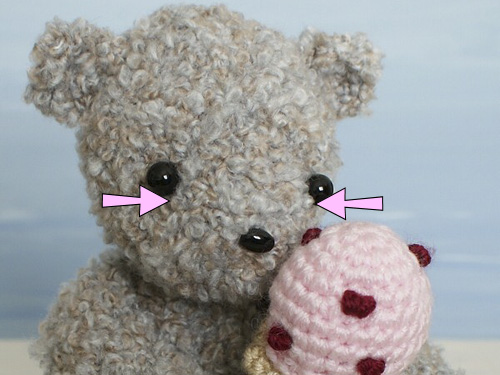
To define an animal’s face by needlesculpting eye sockets, start the yarn at the position of one of the eye sockets, pass the yarn through the head to the other eye socket and then back again, so the sides of the face are drawn towards each other when you pull the yarn tight.
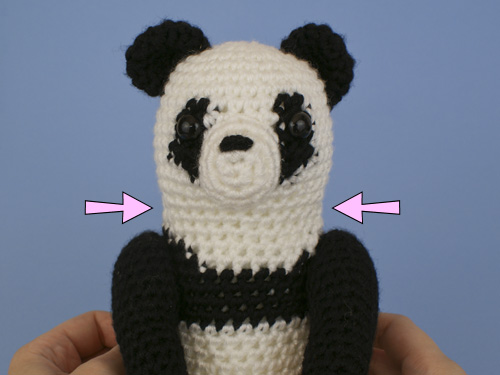
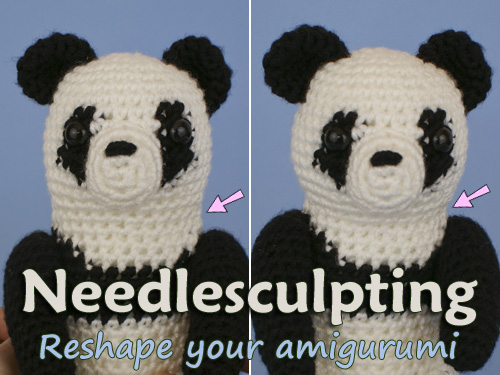
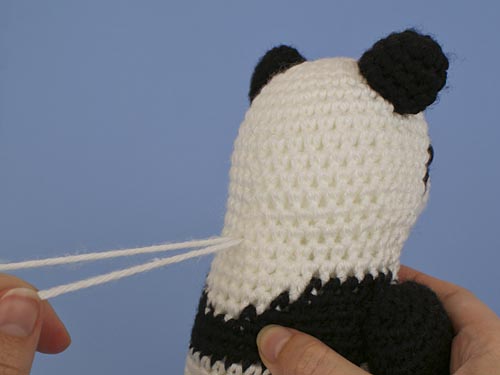
Waist
You can also draw in a piece along a line all the way around the piece, to create a sculpted ‘waist’ that’s narrower than the rest of the piece or as in this panda to reduce the bulkiness in the neck.
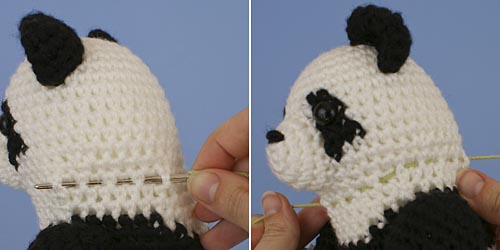
The simplest way to needlesculpt a line is to weave the yarn needle over and under alternating stitches, however this can leave an obvious line of stitches in the finished piece:
Note: Green yarn has been used in the image for demonstration purposes only, use matching yarn in your projects.
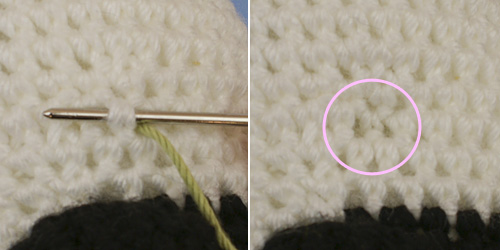
Invisible Finish
For an invisible finish, instead of passing the needle over a stitch, insert the needle beneath the two loops that form the V shape on the front of the stitch.
When you draw the yarn tight, it’ll pass inside the stitch and won’t show from the front.
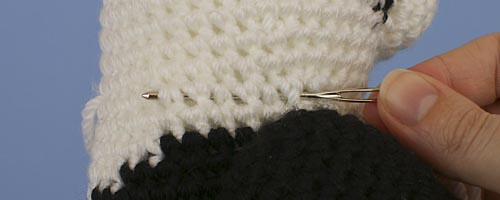
You can either pass the yarn through every stitch in this way, or, for a faster finish, alternate between passing behind and through each stitch, like this:
Passing the needle behind a stitch, through a stitch, behind, through, behind, through…
Finishing Off
No matter whether you’re making one or more dimples, a straight channel, or a different shape of indentation, the finishing process is the same:
- Make all your sculpting stitches, passing the yarn through the inside of the piece to reach the next position.
- Bring the yarn out after the last stitch at the same place you started, so both yarn ends emerge from the same hole between stitches.
- Pull both ends to draw in the sculpted areas.
- When you like the look you’ve achieved, tie the ends of the yarn securely together in a square knot.
- Pass the ends back through the same hole between stitches and lose them inside the piece
Taking it further
You can experiment with this technique to add any size or shape of sculpted line or area you need – just add one or more stitches and pull the yarn tight to see if it creates the effect you want.
If you don’t want to draw two points towards each other (e.g. two eye sockets), or to draw in a complete ‘waist’, it’s best to plan ahead and find a hidden area to anchor your yarn where it won’t show in the finished piece, as the anchor point will be drawn towards the sculpted area(s). For example:
- The inside of the ‘neck’ area, before you attach the head and body together
- Underneath an embellishment or other attached piece, where it’ll be covered by hair, ears, etc
- At the bottom of the piece (e.g. the base of an apple)
Check the result after pulling the yarn ends to tighten your needlesculpting but before tying the knots – if you don’t like the effect, try pulling the ends more tightly or slackening them off. If it still doesn’t look good, you can easily pull out the entire strand of yarn and redo the sculpting with your stitches in different places, until you’re happy with the result.