Finished Sizes
Women’s Slippers: 9 1/4 inches long – to fit women’s US shoe sizes 7 – 9 1/2
Men’s Slippers: 11 1/2 inches long – to fit men’s US shoe size 9 – 11 1/2
How to Adjust the Size
If you know the length of the foot that is going to wear the slipper you can custom fit the slippers by adjusting the size of the granny squares. You can crochet two, three, or four rounds and then fine tune the sizing by adding rounds of single crochet around the outside edge.
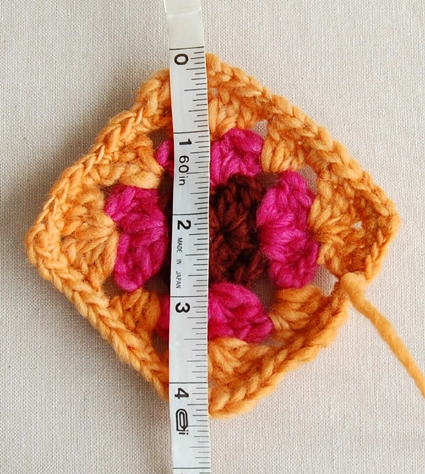
The final length of the slipper is the measurement from one corner of a square to the opposite corner, times two, plus 1/4 of inch (the 1/4 of an inch is a result of sewing the pieces together).
This square from the Women’s Slipper measures 4 1/2 inches x 2 = 9 inches + 1/4 inch = a total length of 9 1/4 inches.
Please also note that the sizing can be quite approximate. The slippers seem to comfortably fit a wide range of sizes.
Women’s Slippers
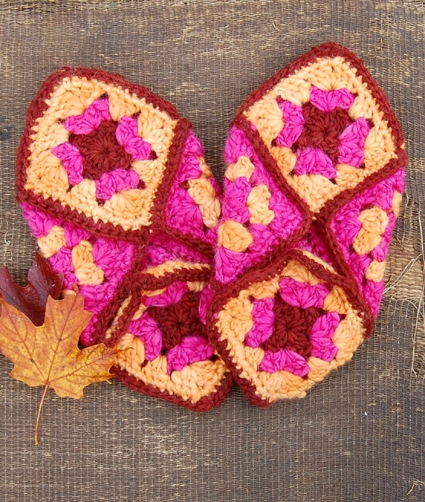
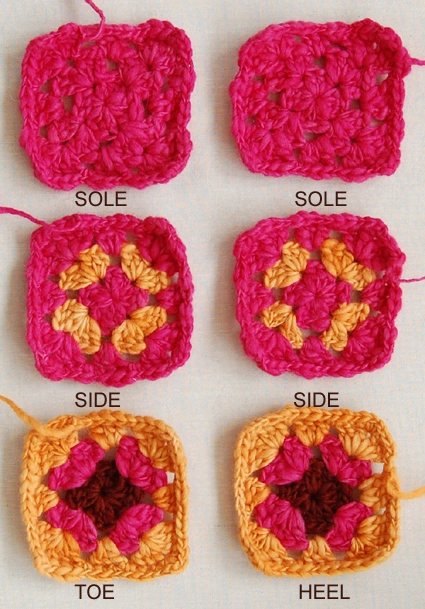
Each slipper is comprised of six granny squares (12 squares total for a pair). (Please visit our Granny Square Tutorial if you’ve never made a granny square or need a refresher.) Each square is three rounds plus a round of single crochet around the outside edge.
(At the corners of the outside round of single crochet, make a single crochet into the corner, chain 1 and make another single crochet into the corner.)
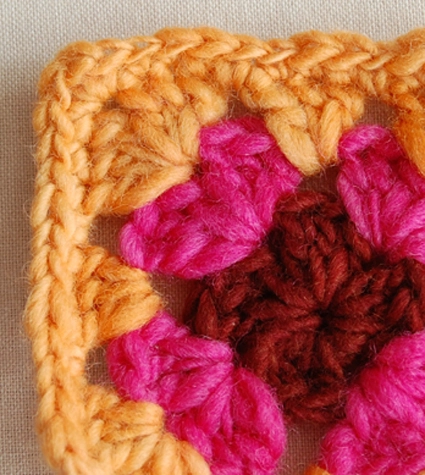
Here is how I arranged the colors for the Women’s Slippers:
Assembling
Crochet the squares together by passing the hook under the two strands of the single crochet of one square, and then under the strands of the adjacent stitch of the square you are joining.
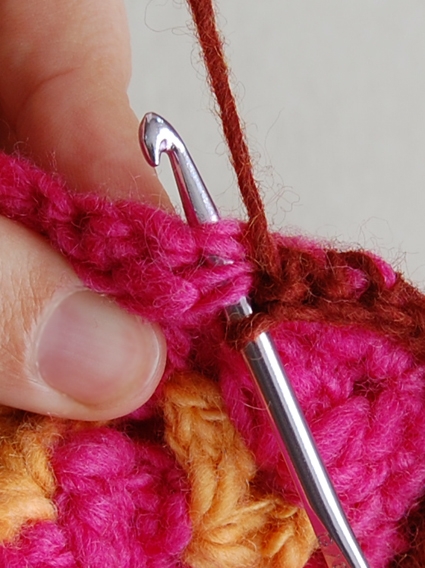
Pull the yarn through and make a single crochet.
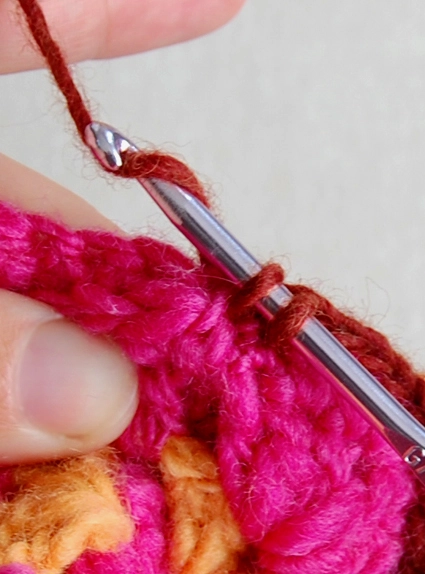
Keeping track of the placement and order of the squares can be tricky. I found the easiest way was to start with the center of the sole, to work my way around one Side Square and then the other, and then to cut the yarn. Then I crocheted around the Toe, cut the yarn, and finally attached the Heel Square.
Confused? Here’s a visual step by step:
Join a Side Square to a Sole Square.
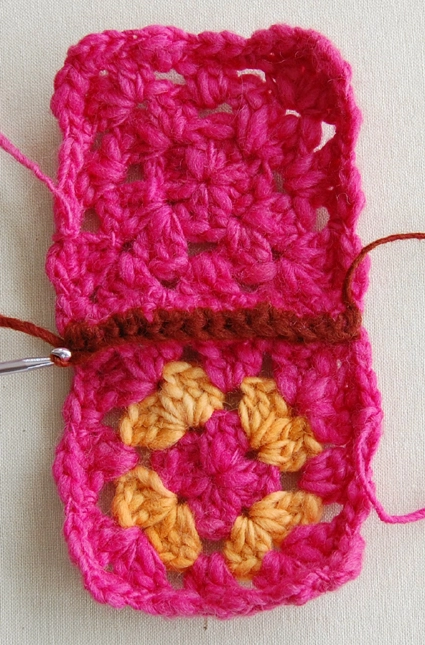
Attach the Toe Square to the next side of the Side Square.
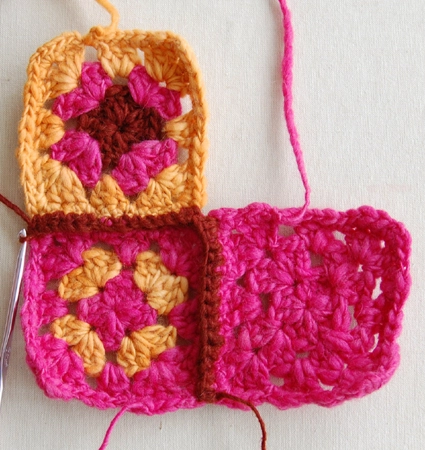
Make single crochets along the next side of the Side Square.
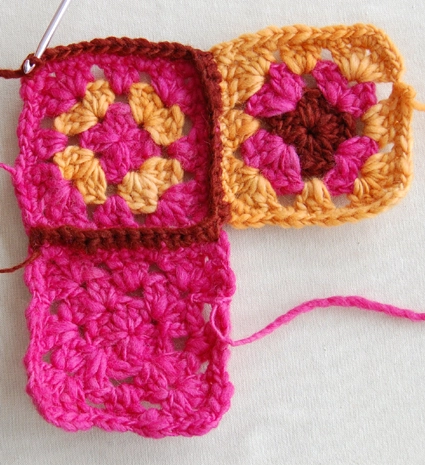
Attach the other Sole Square to the remaining side of the Side Square.

Continuing along this Sole Square, join one side of the other Side Square.
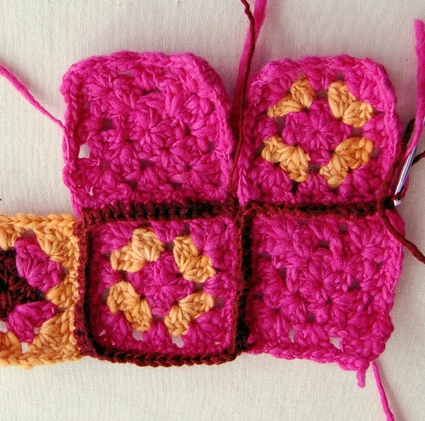
Turn the corner of the Side Square and make single crochets along the next side.
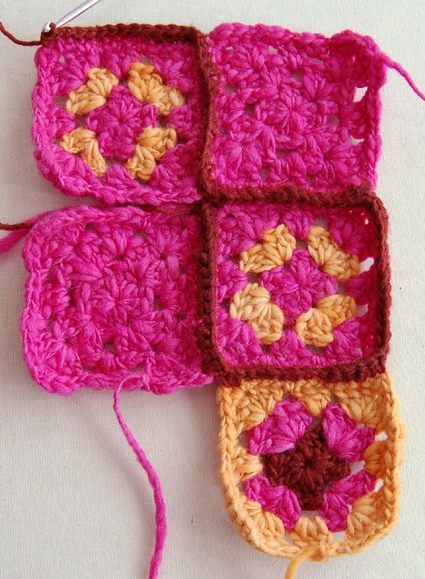
Attach the next side of the Side Square to the Toe Square.
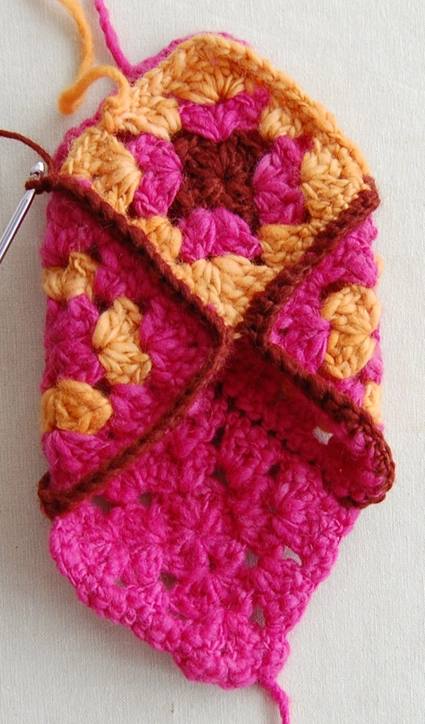
(When you are at a place where three squares meet, you should end up with two single crochets in each corner space.)

Complete the Side Square by joining its remaining side to the Sole Square. Cut the yarn.
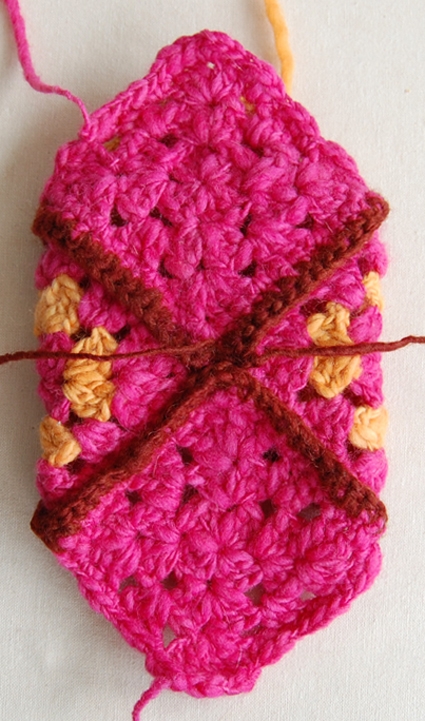
Join new yarn, and connect the Toe Square to the Sole Square, up one side…

…and down the other. Cut the yarn.
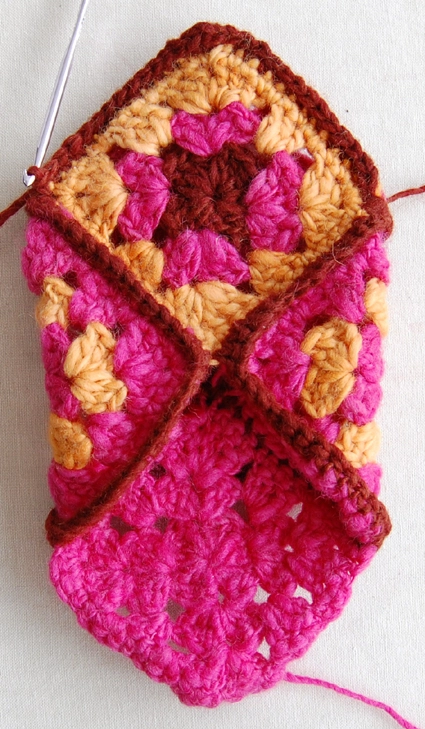
With the Sole side facing you, join new yarn…
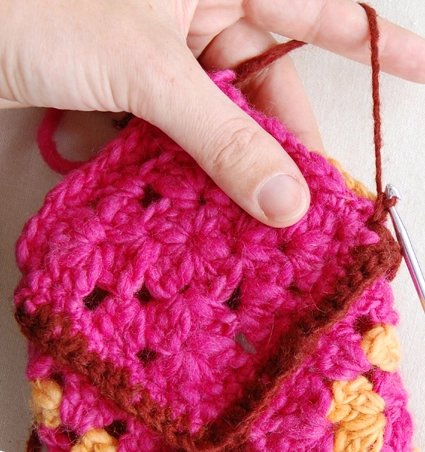
…and attach the Sole Square to the Heel Square.
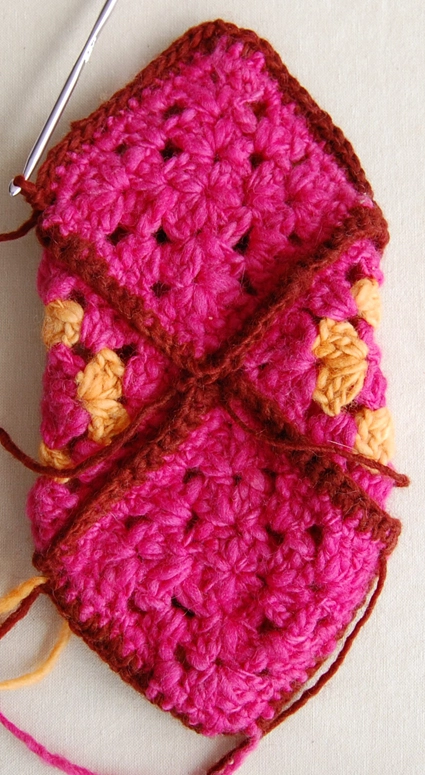
Turn the corner of the Heel Square, and begin the next side by joining it to the Side Square. Just as you have been doing, insert the hook under the single crochet strands of the outside edges.
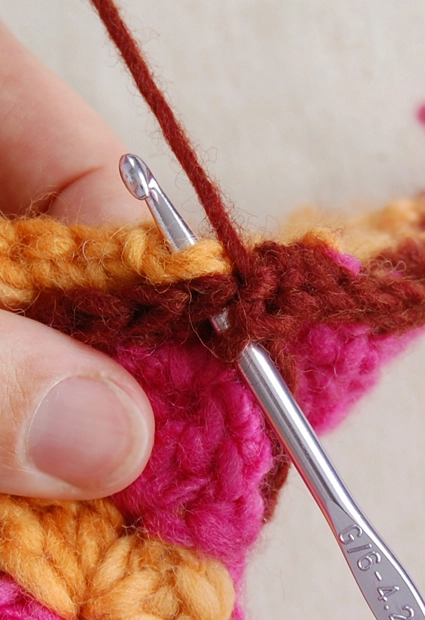
After three stitches…
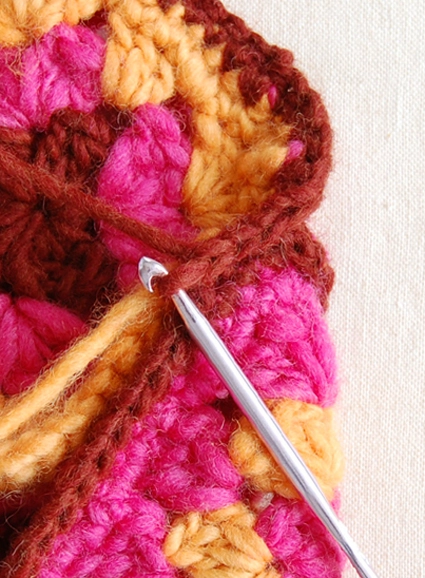
…continue along the Heel Square without attaching it to anything. Just make a single crochet edge along the side, around the corner and down the other side, stopping three stitches short of the end.
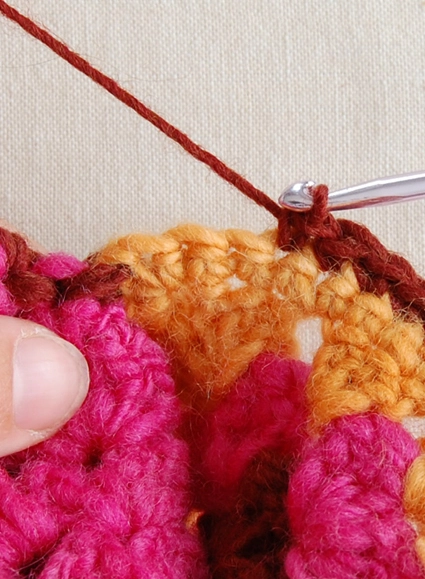
For the final three stitches, attach the Heel Square to the Side Square the same way you did on the other side.
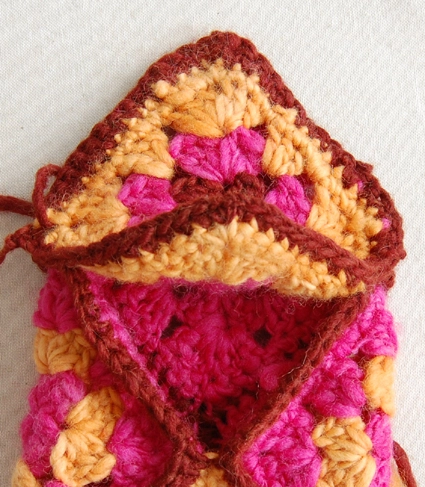
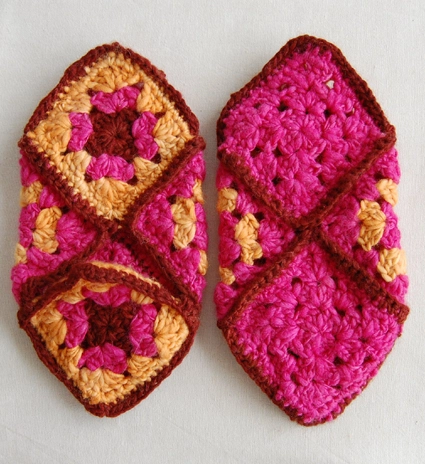
After you weave in all your ends, here’s what the top and bottom of the completed slippers should look like. Ready to wear!
Men’s Slippers
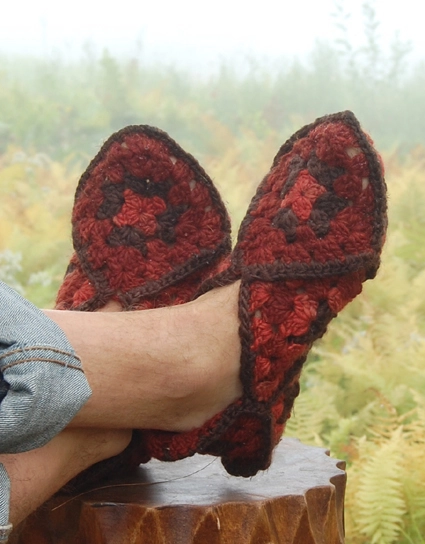
Like the Women’s Slippers, each Men’s Slipper is comprised of six granny squares, twelve squares total.
